In this blog post series I would like to give an introduction to building Figma plugins.
We will be learning using a series of “building blocks” and then turn it into a real plugin in the end. In this first tutorial we will be looking at the most basic of basics: creating a rectangle.
We will make our start using the Figlet plugin, which makes it so you don’t have to set up a development environment and you can start coding right away.
Figlet is a new thing in the Figma plugins community. It’s comparable to Codepen or REPL-like environments in the sense that you can share Figlets, you can easily run them without setting up a dev environment, and you can easily have multiple figlets.
Getting started
Make a new Figlet account inside the Figlet plugin.
Now, create a new Figma design file, run Figlet, and click the new Figlet button.
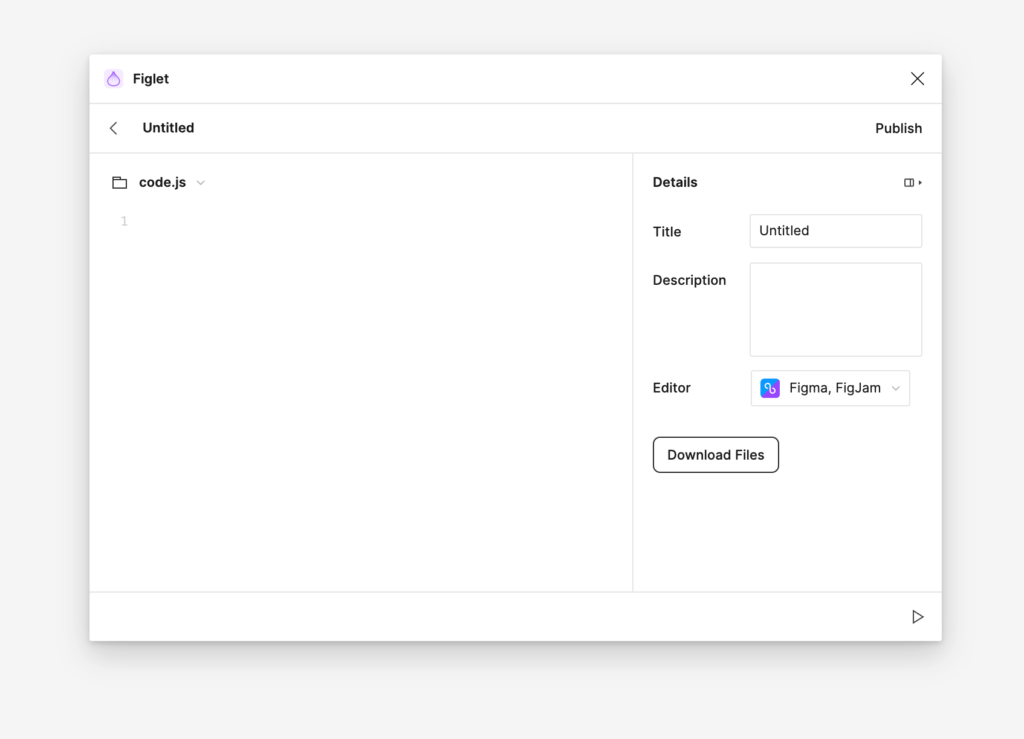
Now you have some code to write! The first building block we will look at is creating a rectangle.
Enter and run the following code:
figma.createRectangle();You will see a rectangle created on your artboard.
But where is it? If you can’t see it, try to find your new layer called Rectangle in the layer panel.
Zoom in to the rectangle (manually) and let’s continue.
Let’s give the rectangle a colour.
This is a good time to learn about nodes first.
Instead of directly running figma.createRectangle(), assign your rectangle to a variable, and log its contents.
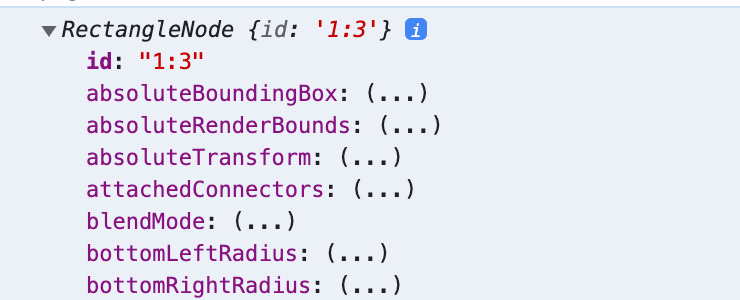
const rect = figma.createRectangle()
console.log(rect)
Now, open the developer console using ⌥ + ⌘ + I (Mac) or Ctrl + Alt + I (Windows/Linux).
You will see the output of an object like this in the developer console.
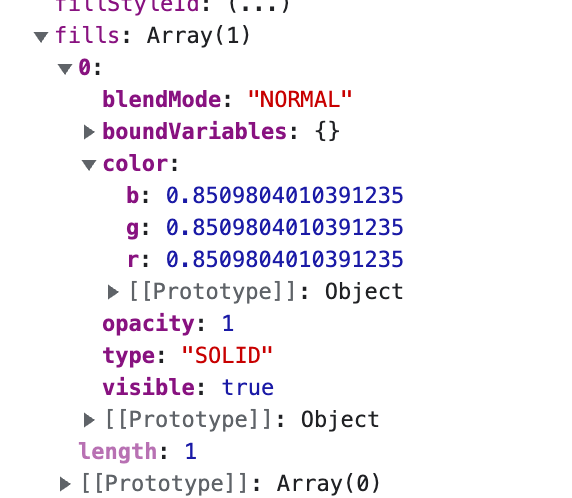
What we are looking for to change the color is the fills object:
At this point, you might be tempted to just directly change the values using some code like:
const rect = figma.createRectangle()
const color = rect.fills[0].color
color.r = 0.5
color.g = 0.5
color.b = 0.5
This does not work!
You can’t directly manipulate certain objects, you have to clone them in their entirety, then manipulate them, and put back the cloned version.
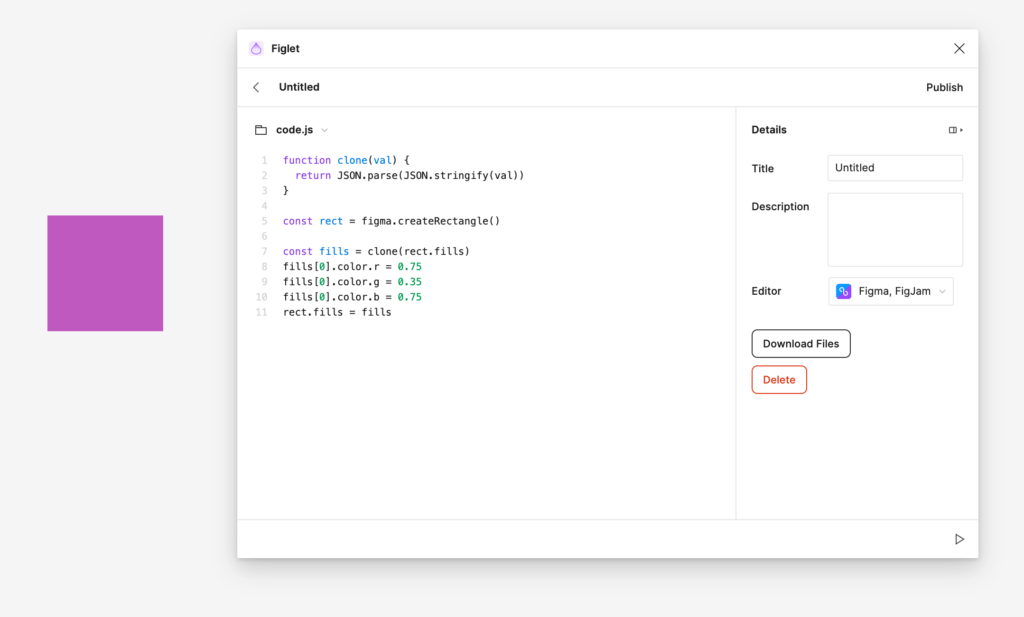
You can do so using code like this:
function clone(val) {
  return JSON.parse(JSON.stringify(val))
}

const rect = figma.createRectangle()
const fills = clone(rect.fills)
fills[0].color.r = 0.75
fills[0].color.g = 0.35
fills[0].color.b = 0.75
rect.fills = fills
(If you are curious, check out the API reference on editing properties here.)
If you run this code, you should see a rectangle on your canvas:
Okay… that was a bit more complicated than you would think. Let’s move on and try to move the rectangle around a bit. Maybe make some more rectangles.
First, let’s resize the rectangle so we have some x/y coordinates to refer to.
Fortunately this is much easier:
rect.resize(50,50)Now let’s create a function out of creating our rectangle. Move the code into a function and run it.
function clone(val) {
  return JSON.parse(JSON.stringify(val))
}

function createMyRectangle(rgbColor, width, height) {
    const rect = figma.createRectangle()

    const fills = clone(rect.fills)

    fills[0].color.r = rgbColor[0]/255
    fills[0].color.g = rgbColor[1]/255
    fills[0].color.b = rgbColor[2]/255

    rect.fills = fills

    rect.resize(width,height)
}

createMyRectangle([255,125,250], 50, 50)
Let’s also add an X/Y position parameter.
function clone(val) {
return JSON.parse(JSON.stringify(val))
}
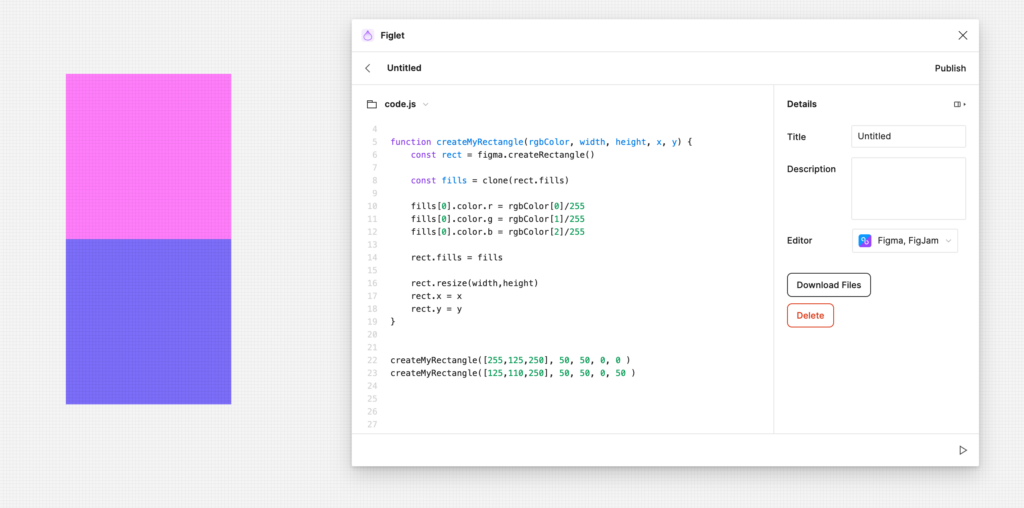
function createMyRectangle(rgbColor, width, height, x, y) {
const rect = figma.createRectangle()
const fills = clone(rect.fills)
fills[0].color.r = rgbColor[0]/255
fills[0].color.g = rgbColor[1]/255
fills[0].color.b = rgbColor[2]/255
rect.fills = fills
rect.resize(width,height)
rect.x = x
rect.y = y
}
createMyRectangle([255,125,250], 50, 50, 0, 0 )
createMyRectangle([125,110,250], 50, 50, 0, 50 )There we have it. A way to create rectangles.
This is a basic building block for the future of our code – and it also concludes our first tutorial.
In the next tutorial we will render some text.
If you are enthusiastic about this tutorial series, place a comment below, it will motivate me to continue!
Extra tips for starting development
- If you are stuck, check the Figma Plugin API reference.
- There is a Friends of Figma Discord where I hang out in #plugin-api sometimes.
- If you are looking for inspiration, check out the official plugin-samples repo.