In the previous tutorial, we ended with 2 rectangles.
The second building block that’s good to learn about is rendering text to the canvas.
Working with text is its own challenge in Figma, because there are a lot of edge cases.
The first thing to understand is that a font needs to be loaded in order for text to be able to render. Fortunately, there is a font that we always know will be there, which is Inter, used by Figma for its UI itself.
So for the sake of the simplicity of this tutorial, let’s start using Inter to render text. Later we can move to a more difficult use case.
If you are starting out, you don’t need to have followed the previous tutorial to do this one. You can start this one from scratch.
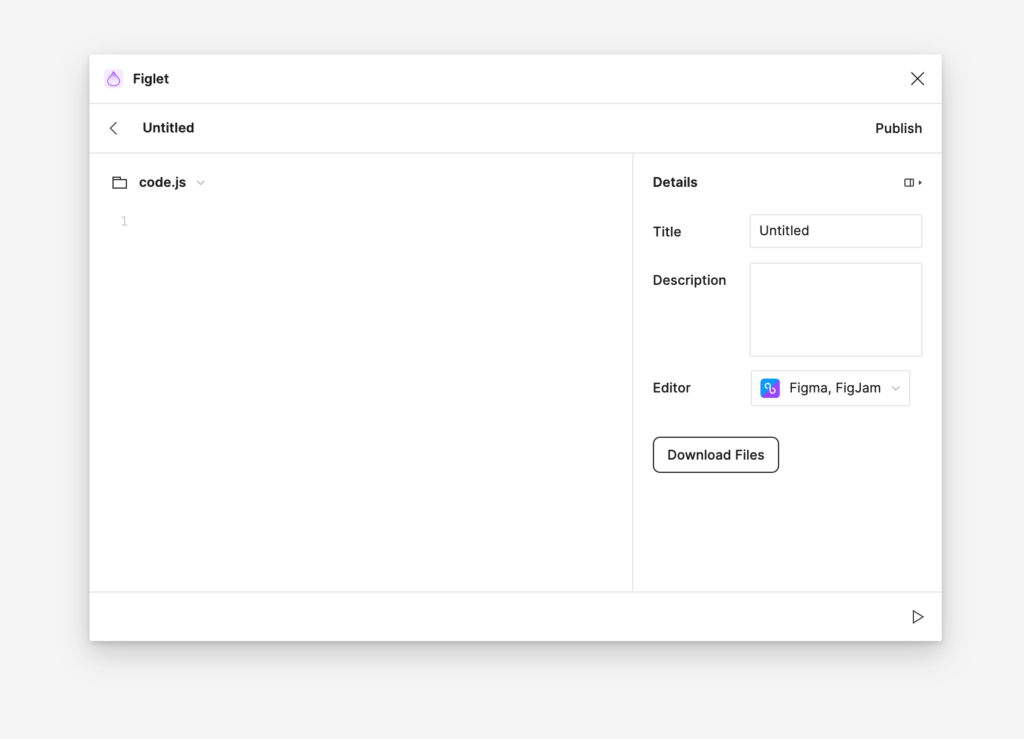
We will once again use the Figlet plugin, which makes it so you don’t have to set up a development environment and you can start coding right away.
Getting started
If you don’t have one already, make a new Figlet account inside the Figlet plugin.
Now, create a new Figma design file, run Figlet, and click the new Figlet button (the + button)
Now you have some code to write! The second building block we will look at is creating text.
Write the following code:
const text = figma.createText()

figma.loadFontAsync(text.fontName).then(() => {
    text.characters = 'Hello world'
})
Now log the constant to the console
console.log(text)There’s a lot of properties there (76 to be exact!).
Let’s examine some of the properties in there that have to do with text styles:
characters: "Hello world"
fontName: {
    family: "Inter",

    style:  "Regular"
},
fontSize: 12,
Let’s try to make the font size a more decent 16px. Add this to your code:
const text = figma.createText()

figma.loadFontAsync(text.fontName).then(() => {
    text.characters = 'Hello world'
    text.fontSize = 16
})

console.log(text)
Now let’s try to make it bold.
You might be tempted to do something like…
text.characters = 'Hello world'
text.fontSize = 16
text.fontName = { family: "Inter", style: "Bold" }
const text = figma.createText()
However, like we noted before, this will not work, because font is not loaded yet (even though it’s available in Figma).
If you load the font asynchronously, like such:
const text = figma.createText()
figma.loadFontAsync({ family: "Inter", style: "Bold" }).then(() => {
    text.characters = 'Hello world'
    text.fontSize = 16
    text.fontName = { family: "Inter", style: "Bold" }
})
…the code will run. But what if we want to load multiple fonts?
You can use the Promise.all Javascript method:
async function loadFonts() {
await Promise.all([
figma.loadFontAsync({
family: "Inter",
style: "Regular"
}),
figma.loadFontAsync({
family: "Inter",
style: "Bold"
}),
figma.loadFontAsync({
family: "Inter",
style: "Medium"
})
])
}
loadFonts().then(() => {
const text = figma.createText()
text.characters = 'Hello world'
text.fontSize = 16
text.fontName = { family: "Inter", style: "Medium" }
const text2 = figma.createText()
text2.characters = 'Hello world'
text2.fontSize = 16
text2.fontName = { family: "Inter", style: "Bold" }
text2.y += 20
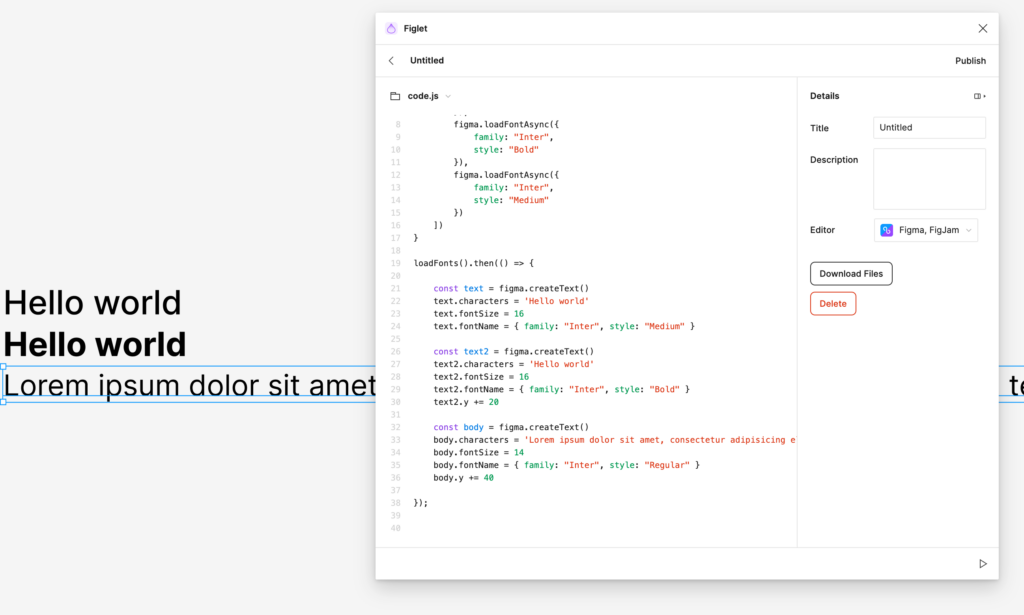
});This should result in this:

Notice how I also used the y part to set the y position of the 2nd text variable.
Let’s see what else we can do with text.
Let’s add a bit more text:
// Make sure the loadFonts from previous example exists

loadFonts().then(() => {

    const text = figma.createText()
    text.characters = 'Hello world'
    text.fontSize = 16
    text.fontName = { family: "Inter", style: "Medium" }

    const text2 = figma.createText()
    text2.characters = 'Hello world'
    text2.fontSize = 16
    text2.fontName = { family: "Inter", style: "Bold" }
    text2.y += 20

    const body = figma.createText()
    body.characters = 'Lorem ipsum dolor sit amet, consectetur adipisicing elit, sed do eiusmod tempor incididunt ut labore et dolore magna aliqua. Ut enim ad minim veniam, quis nostrud exercitation ullamco laboris nisi ut aliquip ex ea commodo consequat. Duis aute irure dolor in reprehenderit in voluptate velit esse cillum dolore eu fugiat nulla pariatur. Excepteur sint occaecat cupidatat non proident, sunt in culpa qui officia deserunt mollit anim id est laborum.'
    body.fontSize = 14
    body.fontName = { family: "Inter", style: "Regular" }
    body.y += 40
});
When you render this, you will see that is unseemingly wide – 2895 pixels to be exact.
Let’s make it a bit more manageable.
Add this code to the body variable and its subsequent manipulations:
body.resize(400,1)
body.textAutoResize = 'HEIGHT'
That looks a bit better.
Now, let’s try to create another style for links. This will involve working an “underline” text decoration, and a color fill.
First set up a basic style:
const link = figma.createText()
link.characters = 'My link'
link.fontSize = 14
link.fontName = { family: "Inter", style: "Regular" }
link.y += 180
Don’t worry about the “manual” y positionings for now, we will learn about positioning things later.
We’ll need the text decoration, add this line:
link.textDecoration = "UNDERLINE"Now, let’s do the colors.
If you remember from our previous tutorial, we need a clone function:
function clone(val) {
  return JSON.parse(JSON.stringify(val))
}
Add this function to the top level of your code (for example on line 18 if you’ve been following along in an exact manner)
Now add similar code as in the previous tutorial:
const linkFills = clone(link.fills)
const rgbColor = [65,111,181]
linkFills[0].color.r = rgbColor[0]/255
linkFills[0].color.g = rgbColor[1]/255
linkFills[0].color.b = rgbColor[2]/255
link.fills = linkFills
This code is a bit annoying, so let’s extract it into a function.
// Usage: setColor(node, [65,111,181])
function setColor(node, rgbColor) {
    const fills = clone(node.fills)
    fills[0].color.r = rgbColor[0]/255
    fills[0].color.g = rgbColor[1]/255
    fills[0].color.b = rgbColor[2]/255
    node.fills = fills
}
Once again, place it outside of your loadFonts().then(() => { block.
Now we have a reusable setColor function to set colors, where we select the node as the first parameter and an array of RGB colours as the second parameter.
The full code for our link:
const link = figma.createText()
link.characters = 'My link'
link.fontSize = 14
link.fontName = { family: "Inter", style: "Regular" }
link.y += 180
link.textDecoration = "UNDERLINE"
setColor(link, [65,111,181])
Let’s modify our existing code a little bit, to assume we are making a typographical system. Try doing the following:
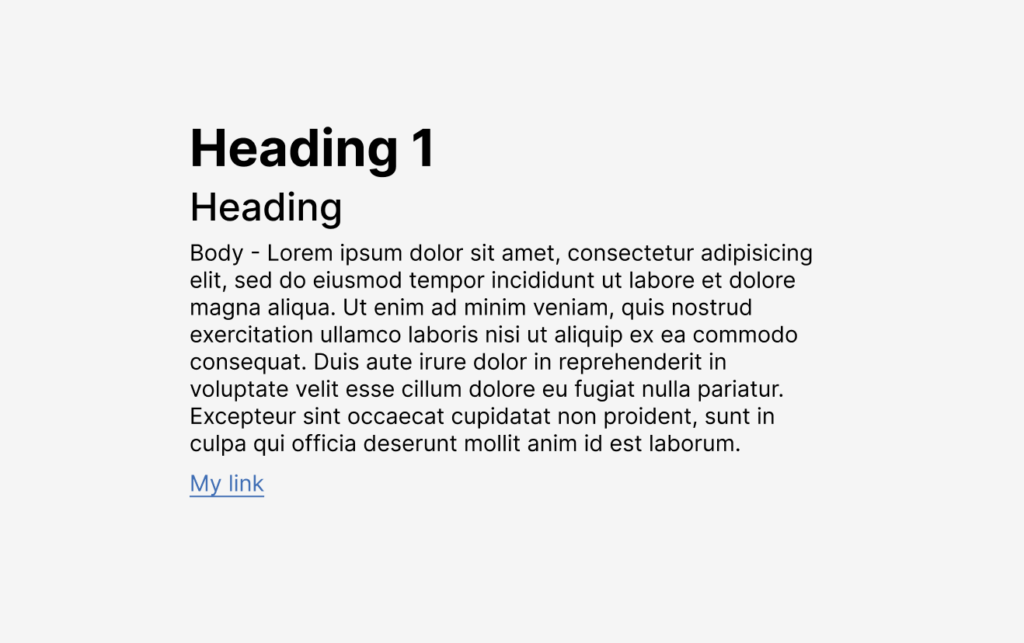
- Rename the first Hello world to Heading 1, and set the font size to
- Rename the second Hello world to Heading 2, and set the font size to 24.
- Swap the bold and medium on heading 1 and heading 2
- Add “Body -” in front of the lorem ipsum of “body” to make people understand we’re talking about the body text there
- Space out the typography examples by adjusting the “y” values.
Your complete text code would look a bit like this:
const text = figma.createText()
text.characters = 'Heading 1'
text.fontSize = 32
text.fontName = { family: "Inter", style: "Bold" }

const text2 = figma.createText()
text2.characters = 'Heading'
text2.fontSize = 24
text2.fontName = { family: "Inter", style: "Medium" }
text2.y += 42

const body = figma.createText()
body.characters = 'Body - Lorem ipsum dolor sit amet, consectetur adipisicing elit, sed do eiusmod tempor incididunt ut labore et dolore magna aliqua. Ut enim ad minim veniam, quis nostrud exercitation ullamco laboris nisi ut aliquip ex ea commodo consequat. Duis aute irure dolor in reprehenderit in voluptate velit esse cillum dolore eu fugiat nulla pariatur. Excepteur sint occaecat cupidatat non proident, sunt in culpa qui officia deserunt mollit anim id est laborum.'
body.fontSize = 14
body.fontName = { family: "Inter", style: "Regular" }
body.y += 76
body.resize(400,1)
body.textAutoResize = 'HEIGHT'

const link = figma.createText()
link.characters = 'My link'
link.fontSize = 14
link.fontName = { family: "Inter", style: "Regular" }
link.y += 220
link.textDecoration = "UNDERLINE"
setColor(link, [65,111,181])
And that code would render an example like this:
That’s where we will stop for now. The final code can be found here.
If you followed along with both tutorials, you now have a basic understanding of creating a shape, and how to render text in a Figma plugin.
I don’t know yet what the next tutorial will be about, but I want to find a logical next step to code, to get to a useful plugin. If you have any suggestions. place a comment below, it will motivate me to continue this series.
Extra tips for starting development
- If you are stuck, check the Figma Plugin API reference.
- There is a Friends of Figma Discord where I hang out in #plugin-api sometimes.
- If you are looking for inspiration, check out the official plugin-samples repo, and my unofficial examples repo.