Ken je dat, van die drukke periodes waar je agenda jou leeft, en je eigenlijk geen tijd hebt? Geen stukje rust? Van het ene naar het andere? Wel, zo een periode gaat nu eindelijk eindigen, binnen een een dikke week denk ik.
Binnenkort dus: genieten van het niets. En na even vakantie toch weer uitkijken naar werk, denk ik.
Ik ben er nu voor aan het zorgen dat elk project afgewerkt is, zodat ik kan beginnen van een leeg blad.
Het wordt een spannend werkjaar denk ik. Het werkjaar waarin Mono 5 jaar oud wordt. Waarin we onze groei kunnen voortzetten en ons bedrijf kunnen vastklikken als een blijver.
This is some extended writing that got kickstarted by watching Brad Frost’s talk about Design Systems at the recent CSS Day 2019. If you are interested the video is online.
Brad Frost at CSS Day 2019
Before the conference I had heard a podcast episode where Brad was talking about design vs. dev and design systems with Dan Mall recently and I was like: Brad Frost certainly has veeeeery similar ideas about design systems as I have.
And then the presentation came and for the most part I was just nodding and I as like: yep, yep, that’s what we are doing in our projects. Brad uses his Pattern Lab, we use Bedrock. The deliverable to clients is a set of HTML/CSS templates and documentation of the components and patterns used. The underlying ideas are similar.
Now at some point Brad talked about how it might be interesting to keep the design system in basic HTML (as opposed to doing it directly in a framework like React) because, well, it can be a bit more stable, since HTML and CSS do not change every few years like Javascript frameworks do.
I am not sure I agree. On a surface level I tend to agree because I am not a JS developer and that part of the system, the HTML/CSS, is exactly what I can manage. But isn’t this a choice that is just limited by “our own skillset”? I.e. Brad Frost has wrote a blog post on his struggle to learn React.
I am in the same boat. I simply have never had the time (nor interest I guess) to learn React properly. I am simply not a JS developer and learning React is pretty much learning all the latest JS techniques.
My work is design, I live in a design application, sometimes in code, but never in deep application code. I don’t need to “make a route”, I just create a new template. If I want to insert a library, I don’t need go through a lot of magic mumbo jumbo, I just use a script tag.
Now, I’ve been doing a lot of thinking over the past two years. The thinking always comes down to the same: whether we should maybe start thinking of moving our design systems deliverable to something like React or Vue when delivering them to our clients – instead of basic HTML and CSS.
Do we deliver basic HTML and CSS because:
we don’t specifically have the React/Vue skills
because it is leaner – less work to make our “design point”
because we don’t want to bother with the JS flavor of the day? (our clients can literally use any programming language)
And if we deliver a big HTML/CSS kit, how much translation work is there for the devs to make it a real working UI framework/design system?
If we would do a React deliverable, would the dev parties we work with even like that? The people I have interviewed about our deliverable are seemingly perfectly happy with what we gave them. I’ve heard things like “A great base to continue from. ” – “I have never seen such an extensive deliverable” “now we have much less work than we anticipated” “we have little CSS skills in the team so this was a godsend” and later on “we’ve used your design system to create 3 more apps without the involvement of a designer. Awesome.”
A lot of questions to unpack and I’m not sure.
All I know is that I am a UI designer who is not fluent in React or Vue at all, but my HTML/CSS skills are there and they are up to date. And this counts for the rest of our team as well.
So should we React? I dunno. I would welcome some opinions on this from designers who did venture a bit deeper into React/Vue than I did.
Anyway. I can go on and on about the design systems topic, as it has been a big topic at work for the past 2 years. I might just have to split this off into a separate blog post.
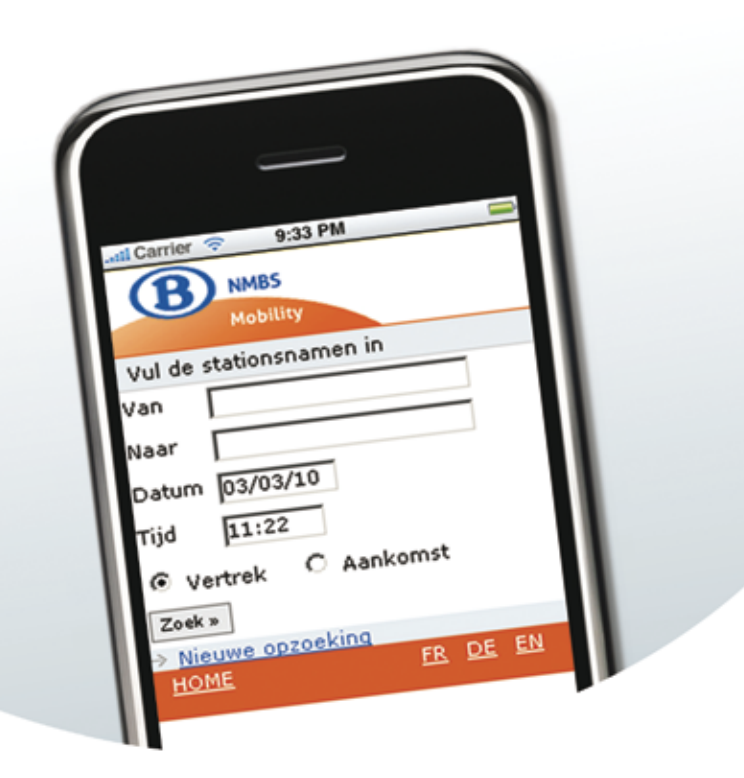
De nieuwe NMBS website is totaal niet toegankelijk.
De website was een tijdje in een soort beta-vorm, en dan heb ik het door de vingers gezien om er over te klagen.
Maar nu is de website toch al een tijdje uit, en heeft NMBS ook besloten om mijn eigen “preferred interface” naar de treintijden nl. m.nmbs.be ( ook een tijd http://mobile.b-rail.be/nl/ ) af te sluiten.
Oubollig maar snel en toegankelijk. Geen zever.
Dus nu wordt het een persoonlijk probleem. De m.nmbs.be wordt nu geredirect naar belgianrail.be .
De basis van de toegankelijkheid werkt niet, en dan heb ik het nog niet eens getest met een schermlezer. Als je tabt van veld 1 naar veld 2 nadat je iets in veld 1 typt wordt het veld leeggemaakt. Als je nadat je een resultaat hebt op de back button van je browser klikt om terug te gaan gebeurt er… niets. Dit is de basis, en dat is niet in orde. En dat was het ervoor wel. Hoe kan iets zo hard achteruit gaan?
Toegankelijkheid is een Europese verplichting voor overheids websites. Vanaf september 2019 moeten alle nieuwe overheidswebsites toegankelijk zijn (zie deze post). Dat is dus binnen 3 maanden hé.
Om dit te bouwen worden publieke middelen gebruikt.
We krijgen een nieuwe flashy website die slechter is dan de vorige.
3/4 van de homepage wordt gevuld met reclame en “nieuws”. Hint voor de NMBS: de toptaak van de website is de treintijden opzoeken. Daar moet ik geen gebruikersonderzoek voor doen.
Er zijn nu mensen die gewoon niet aan hun treintijden geraken, tenzij ze een applicatie gebruiken als Railer, gemaakt door 1 privépersoon. Een applicatie die wél toegankelijk is.
The CSS day team already put up all the videos from CSS day on YouTube, so you can already watch all of the talks! Amazing.
1.5 Brad Frost – The technical side of Design systems
A UI inventory – when you look at what is out there. Dun
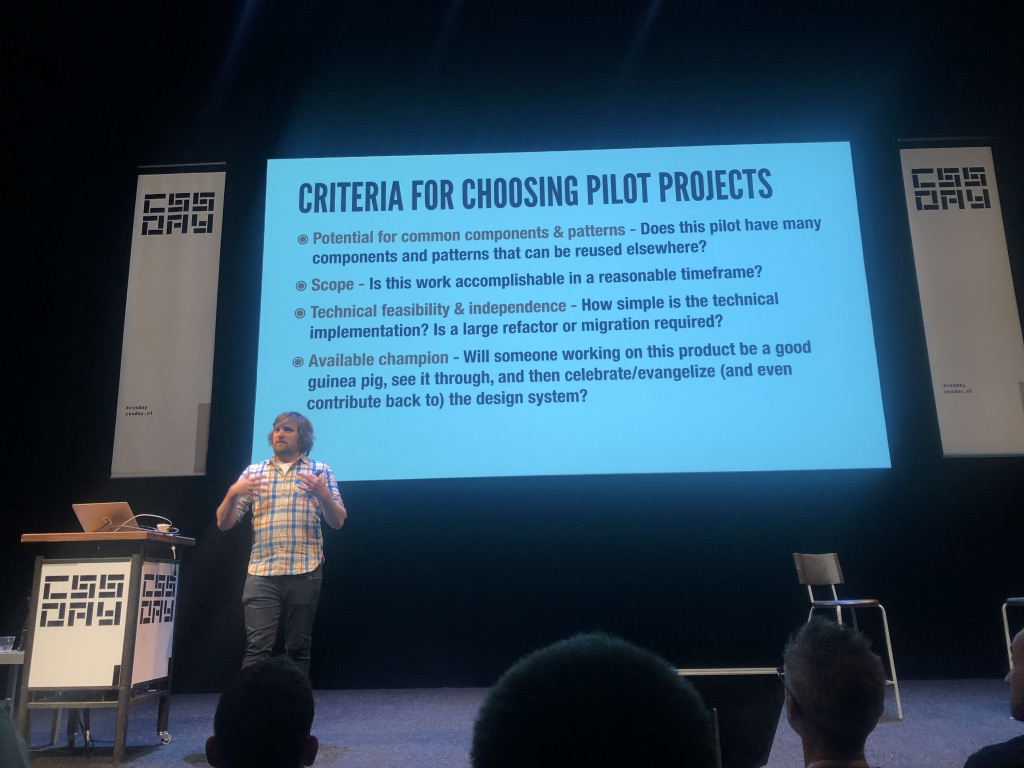
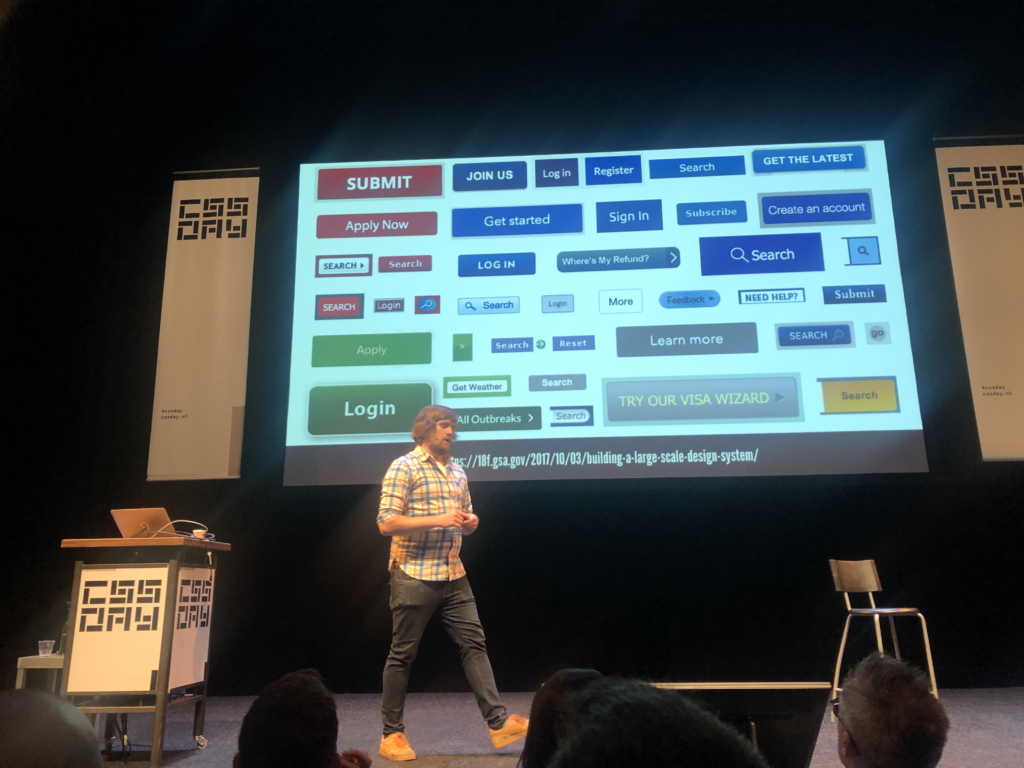
This afternoon sessions opened with Brad Frost talking about the technical side of design systems.
Brad was talking about how organisations can work on a design system using a pilot project. Organisations can sort of make an inventory of their existing apps and then decide which impending (re)design to use to pilot their first design system.
He made the important statement that a design system is not a Sketch file. A design system is a collaborative tool. He showed his work on Pattern lab which reminded me a lot about what we are doing with Bedrock.
He talked about how it might be interesting to keep the design system in basic HTML because it is technology independent.
I’ve got some extended thoughts on that which I will be talking about in a future blog post. Overall this was a great talk which mostly had me nodding in agreement.
1.8 Jared M. Spool – The UX tipping point
The day ended with Jared Spool talking about the UX maturity of organisations. This was near and dear to my heart as I have been working with different clients and I’ve been figuring out why it’s possible to do good work at one organisation whereas the same techniques do not really apply to another organisation.
I think Mr. Spool has been talking about the Disney story for quite a while and has just been repeating the same talk for quite a few times. But anyway. I guess I am at the right “career stage” now to actually make good sense of what he was talking about and apply it to the work that we do at Mono. I’ve heard from some other people that they didn’t really “get” the talk – and I think it would’ve felt the same a few years ago.
Mr. Spool talked about how UX maturity can grow within an organization. There’s the dark ages where there is no UX at all, followed by what he calls “spot UX”, where someone does something small but it is not structural.
The next phase, phase three, is UX as a service. The organisation figures out they need UX. Everyone can call up the UX team and use them as a some sort of global service.
The next phase is that the teams who need this service figure out that they want a full-time person. So things move over to embedded UX teams. Now, Jared also talked about a fifth level which he calls Infused UX design, and this is when the whole org is at a certain design level and can deliver outstanding results. This is what happened with Disney.
He argued that in big organisations different teams and different parts of the company are at different levels.
More…
More posts about CSS day are coming when I find the time!
(You might have noticed I’ve skipped over some of the talks in my report – this was because I was either not very attentive during the talk or I don’t have a lot of to say about the topic.)
I wrote so much about CSS day that I decided to split the content in multiple blog posts. I posted the intro yesterday. Now it’s time to get into the talks.
CSS day is a 2 day conference. Day one was the “UI day” with a focus on design talks, often zooming in on the intersection of design and development.
Day two was the actual CSS day with mostly technical talks about CSS itself. In this post I will cover the first four talks of the first day.
Sara Soueidan
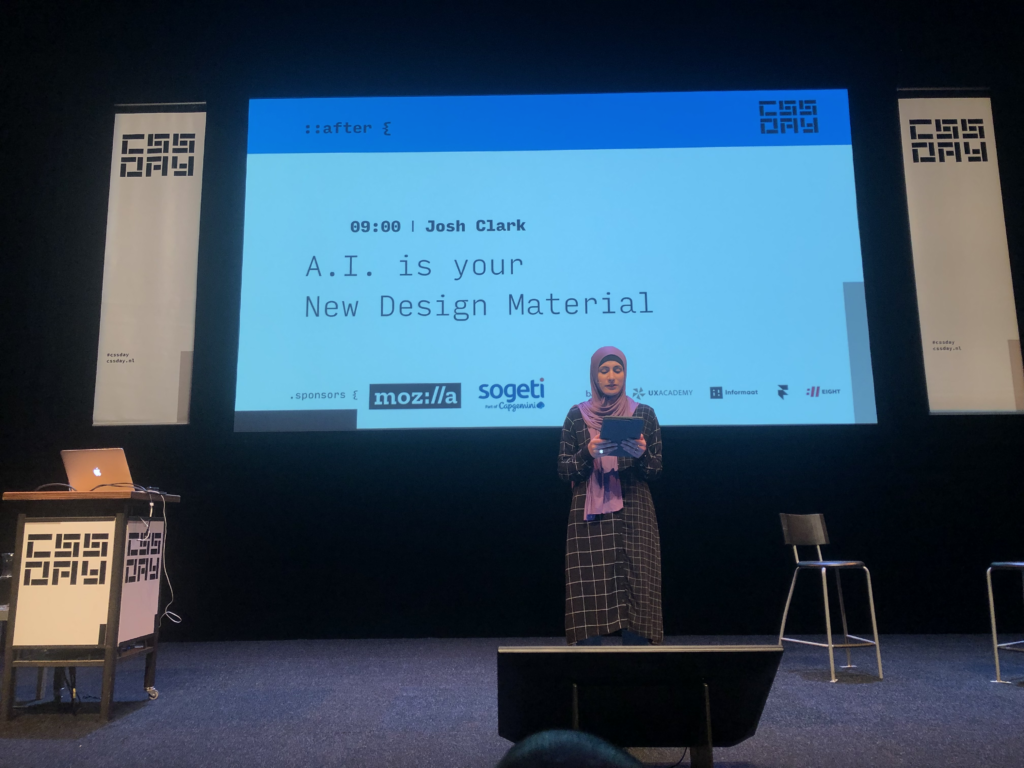
Sara Soueidan was the M.C. for day one and opened with the intro and practical things.
My colleague Emily had visited Sara’s accessibility workshop earlier this week about accessible front-end patterns. I would have loved a talk by Sara (remembering the splendid talk about SVG filters from CSS day 2018), but unfortunately she did not present. I do have to say she did a splendid job at MCing.
1.1 Josh Clark – A.I. as your new design material
The first day opened with Josh Clark talking about “A.I. as your new design material”. He argued that we should be thinking about things like machine learning as another ingredient to add into the mix when designing.
I thought this was really interesting as an idea, but I cannot see a practical way in front of me to try and incorporate machine learning into the interfaces that we make. I am also not sure whether machine learning is really a “design ingredient”, unless you assume “the design” means “the thing”.
Josh had lots of good (and bad :)) examples to basically give the audience a chance to start thinking about how they could use machine learning.
He explained us that we have to teach the machine (well, computers — the model — you know what I mean) what is “normal” and that doing that is a challenge in itself. We need to anticipate the problems that machines will have and set the right expectations for ourselves.
Machine learning is a probabilistic tool and should be treated as such. 80% certainty and 95% certainty are 2 different things. Machines don’t think like humans. They uncover other connections. Since the machines are weird, we can sometimes draw insights from the unexpected.
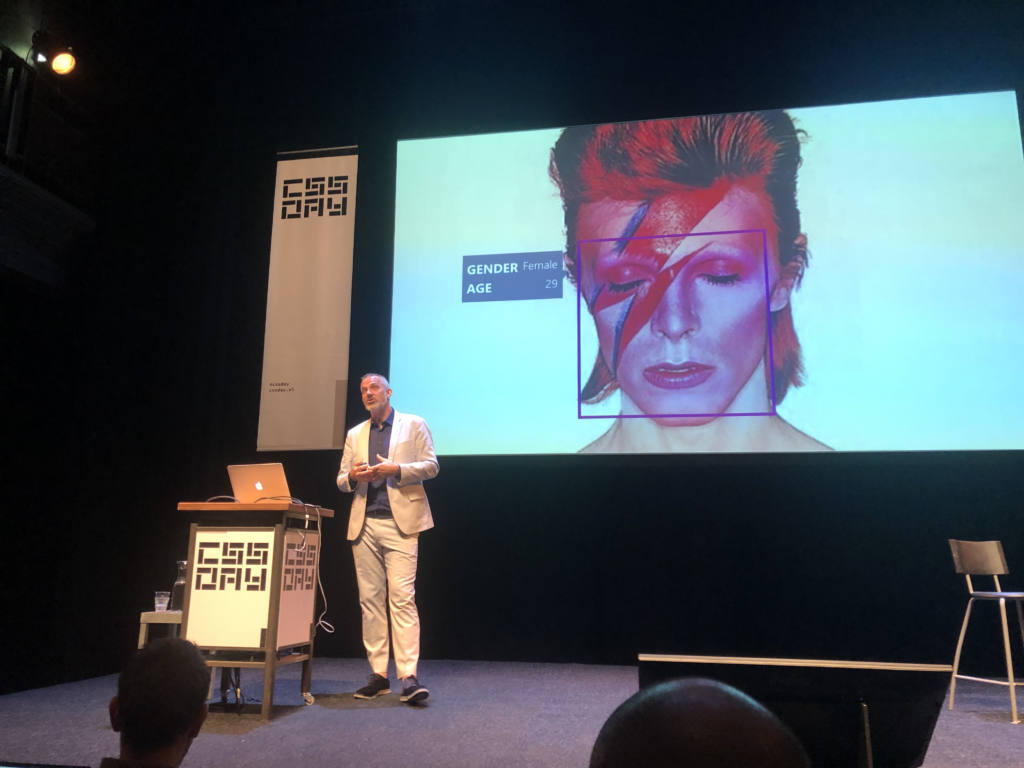
He pointed to some cloud services anyone can use to experiment with machine learning – most interestingly Microsoft’s Cognitive Vision cloud services which you give a photo as input, and then it would return in text format what is on the photo (or at least sort of what is on the photo).
Josh Clark at CSS Day
I really liked the slide were David Bowie is identified as female, 29 years old by a machine. This slide is about so much in one simple looking slide.
I had already read a summary of this talk at Michel’s blog before seeing it, but it was interesting nonetheless. People obviously repeat their talks if they are a speaker, and I don’t have a problem with that.
Josh is such a skilled presenter. I was in awe about the way he juggled his slides with his words. CSS day was off to a great start.
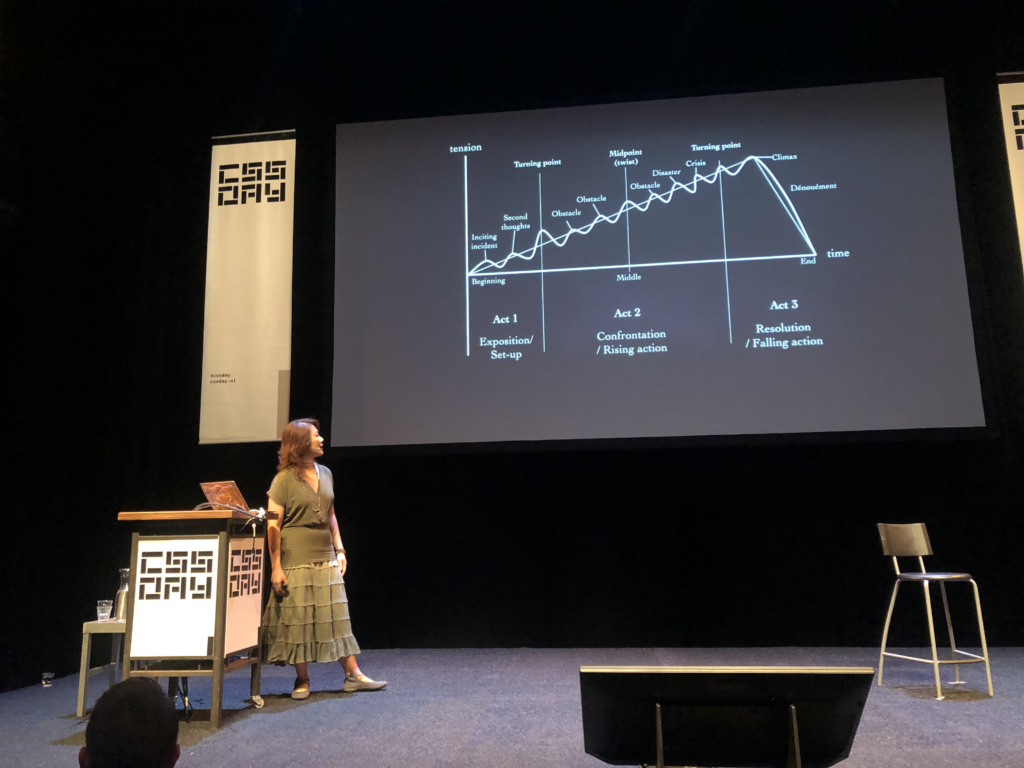
1.2 Stéphanie Troeth – Behind the Story
Next up was Stéphanie Troeth who talked about storytelling in her presentation “Behind the Story”.
Stéphanie used to be head of research at Clearleft. She talked about story arcs, first talking about a personal story about something that happened with her at an AirBnb – then moving on to different story arcs – which was all based on some Kurt Vonnegut video.
This is curious since I had read about a talk from Erika Hall at UX London on the aforementioned UX London report that used the exact same video.
Stéphanie Troeth at CSS Day
It’s sometimes good to surface old good stuff (I think more people should know about the mother of all demo’s for instance) but maybe if I ever give a presentation I would kind of avoid showing someone else’s presentation in my presentation? I dunno. I am on the fence.
Now, her main point was that something needs to be a story to be remembered, because we humans are terrible at remembering stuff. I thought this was interesting – the point about story arcs might be useful to make some of my writing a bit more exciting – and it was well presented as well.
Then Stéphanie tried to make the connection to design and things got a bit vague in my opinion. She went on a trip down memory lane. She asked “What happened to storytelling in design?” She argued that lots of things happened between 2010 and 2013 (and a bit in 2016) but lately it is rare to find storytelling in design. She mostly referred to news articles like this one from the NY times.
My main thought, but this was also a thought I had about the talk before this was: what does this have to do with UI? There was not a lot of relationship to the main topic of the conference.
Now, I wrote down my extended thoughts on that in a separate blog post, because that opinion got way too long. So that’s something for later.
(I am going to skip over talk 3 because I honestly do not know how can I summarize it, it was like 3 talks in one talk.)
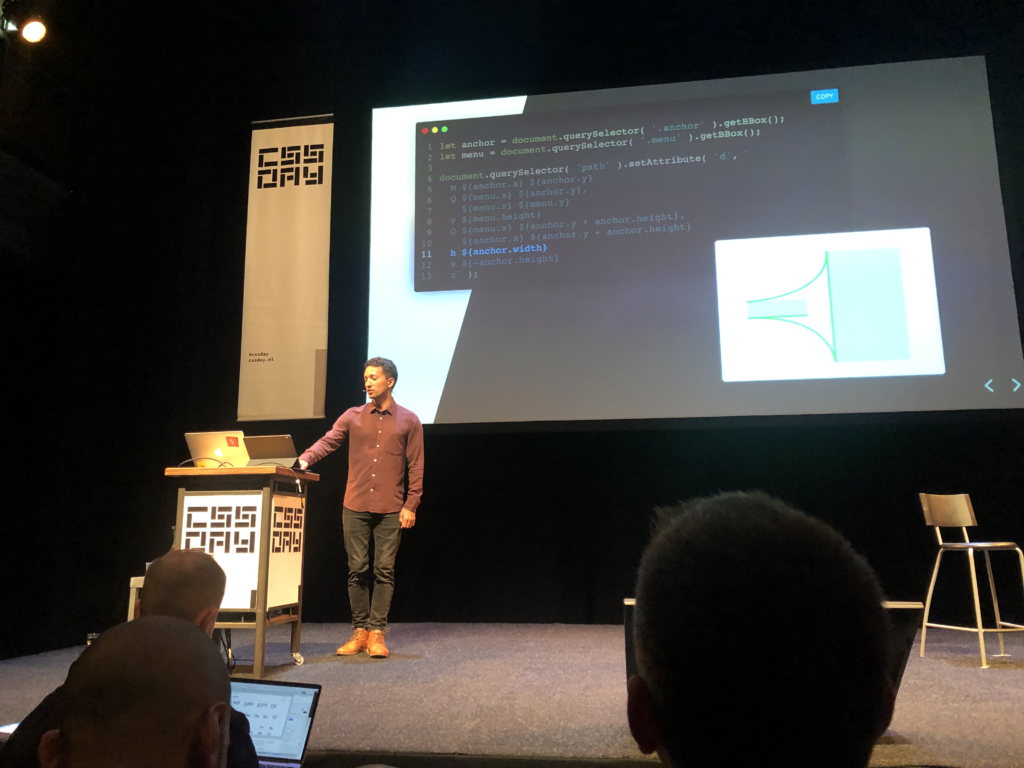
1.4 Hakim El Hattab – Building better interfaces
Let’s move on to the fourth talk of the day, by Hakim El Hattab. This was a real highlight for me. You might know Hakim as the creator of Reveal.JS. His personal website is at Hakim.se . He turned his work on Reveal.js into a product called slides.com, which is cloud software to make presentations.
Hakim el Hattab at CSS Day
Hakim’s topic was how to build better user interfaces. First Hakim walked us through some of his UI experiments which you can also see at his website. A simple example is turning a button into a loader. Your eye is already focussed on that spot, so it make sense to give feedback there.
There’s only 2 people working on that product – they are a small team and they have to make choices. So they don’t have a big design system yet. What they do have is just a UI kit. He showed us slides.com/wireframe (which is so well done) and highlighted some pretty impressive details when it comes to making UI more robust and easier to use.
He went on to talk a bit more deeply about how he handled the UI for slides.com with a deep dive into some of the UI elements they use. He told us that basically he could bring his past knowledge all together in this new product. This sounded very familiar to me. I was working on something new recently and a lot of lessons from the past came together in that UI.
He did a deep dive into UI considerations when using popovers/popouts, keyboard shortcuts, loaders etc. For me this talk was perfect because some of the things he’s shown are exactly the sort of things I feel we can still improve upon when we deliver UI to our clients.
He ended on a high note explaining his excursion into making hover dropdowns more usable in detail which was really cool (see this tweet and his presentation).
I love how he is open sourcing a lot of his work. Hakim seems like a truly great & humble guy. If you’re into UI details and animation and you can ever catch a video of this talk, you should.
More…?
More is coming up in a next blog post, probably somewhere next week!
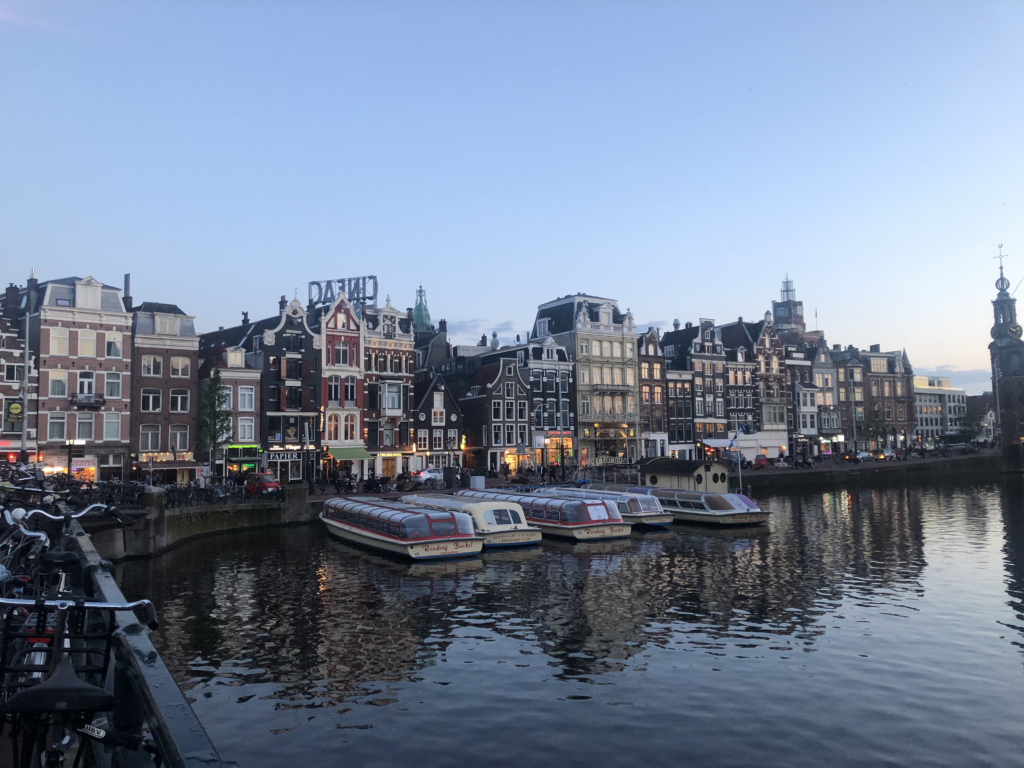
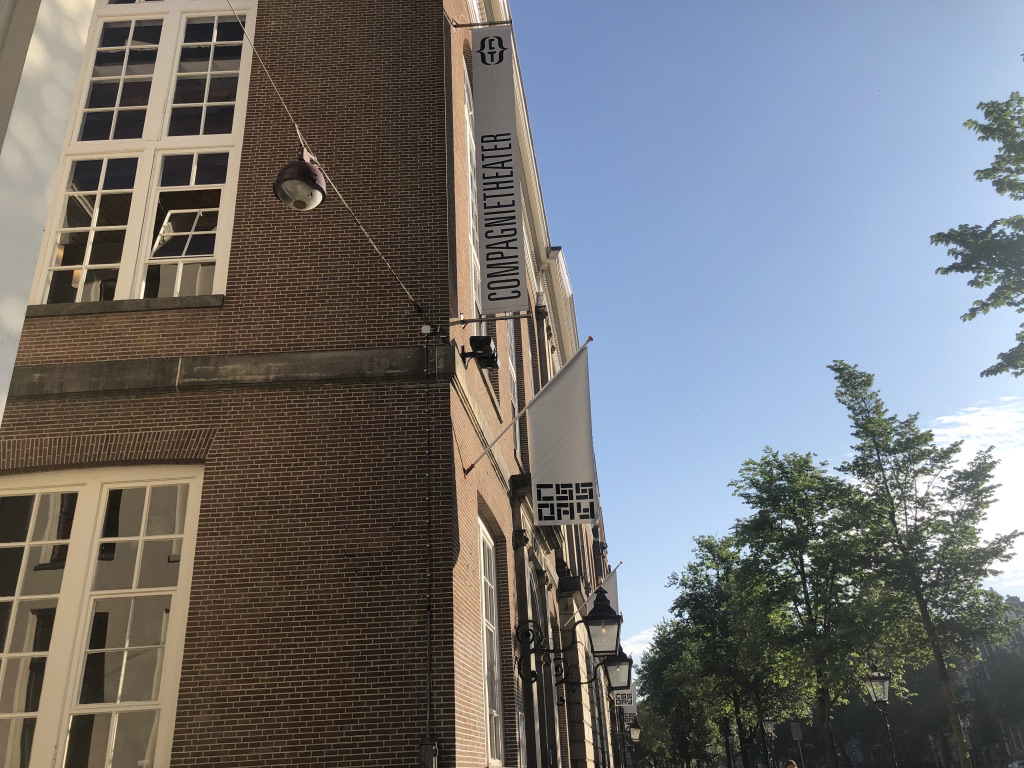
Just like last year I went to CSS day – and I had a blast. Two days filled with a well curated programme. Perfect organization in a perfect venue. This year I took two of my colleagues along – Eva and Emily – and judging from their feedback they had a great time as well.
Oh beautiful Amsterdam.Actually a photo from last year.
In this first post in a series about CSS Day I want to say something about the organization.
Hot damn!
Like I said on Twitter I want to congratulate the conference team on a job well done. As a visitor it felt effortless to navigate the conference, the breaks and timings of everything was right, the food was great, the internet worked well etc.
When nothing goes wrong, you sort of take it for granted, but I know that doing this in a good way takes a lot of effort under the hood. So just saying I am genuinely impressed by the smoothness of it all.
For me a conference is really a few days of thinking. With lots of input but also lots of output as well. Your head is filled with ideas which you then discuss with peers to bounce back & forth and refine your thoughts. It’s pretty awesome.
My head is filled with information now and if you would chart the synaptic activity in my brain during conference days I think you might just see a huge spike. And now that info has to somehow get processed as well… using my favorite thinking process…. writing!
In the next few days (weeks?) I will be publishing reports on the different sessions as I process my notes and think everything through. I hope that for those who couldn’t attend that these blog posts can serve as references to some of the highlights of the conference.
That’s it for today, I have to go attend a wedding party. There are worse things in life right?
Ik heb de laatste tijd redelijk veel sollicitaties binnen gekregen. Wij zoeken namelijk nog altijd nieuwe designers bij Mono.
In deze post wil ik graag ingaan op wat ik graag zie bij een sollicitatie. Waar ik op let, en wat ik belangrijk vind.
Het begin: de motivatie
Eén: stuur een motivatie. Stuur me niet gewoon je CV. Stuur mij je motivatie waarom je juist bij Mono wil werken. Liefst rechtstreeks in de e-mail.
Pro tip: vul het juiste bedrijf in. Ik heb vorige week iemand gehad die voor “Modo” solliciteerde. Ik heb ook ooit eens een sollicitatie binnen gehad voor These Days. Een hele slechte copy paste, vermoed ik. Ik heb hetzelfde ook al wel voorgehad bij het mailen van kandidaten. Vergissen is menselijk. Maar hoe je die vergissing opvangt zegt dan veel over jezelf.
Een motivatiebrief kan voor mij ook in een opgemaakte PDF, dat vind ik even goed. Maar dat leest mobiel minder makkelijk.
Dan: het CV
Twee: een CV. Hou het kort en bondig. Hoeveel jaar heb je waar gewerkt. Welk diploma heb je gehaald? Waar woon je? Hoe oud ben je? Welke talen spreek je? Probeer het op 1 pagina te krijgen. Als het niet op 1 pagina kan, dan staat er waarschijnlijk te veel op.
Ik wil ook geen gecombineerd portfolio en CV, of gecombineerde motivatie en CV, of alle 3 in een PDF met 20 pagina’s.
Een CV van een vormgever moet goed vormgegeven zijn. Niet te veel franjes, maar je moet wel tonen dat je een pagina kunt vormgeven.
Wat ook goed is voor mij is een goed ingevulde LinkedIn pagina.
Een CV gaat vooral over feiten, niet over meningen. Ik kan het aantal keren dat iemand 8/10 heeft ingevuld voor zichzelf als “skills in {Design programma X}” en er achteraf weinig van blijkt te kennen niet meer tellen.
Dus doe je zelf een plezier, en haal die balkjes met skills weg. De skills evalueren wij toch op andere manieren.
En het doet me pijn om dit te moeten zeggen maar: laat je CV controleren op spelfouten! Geef je CV aan iemand anders en laat die corrigeren. Het is ongelofelijk hoeveel CVs vol spelfouten ik binnen krijg.
Het belangrijkste: je portfolio
De beste manier om je skills te tonen is je portfolio. Nu, een goed portfolio, dat is een kunst op zich.
Een portfolio dient om je werk te tonen. Dus daarover heb ik ook enkele tips.
Solliciteer met relevant werk. Voor een UI designer positie betekent dit user interface werk. Het klinkt logisch maar het aantal portfolio’s met relevant werk is… euh… beperkt.
Duid bij projecten aan wat groepswerk was en wat individueel werk was, en wat je persoonlijk hebt bijgedragen
Toon niet enkel het eindresultaat, maar ook het proces
Als je voor een developer positie solliciteert, ontwikkel je eigen website (!). Niets zo erg als een template gebruiken.
Velen hebben het probleem dat ze “niet genoeg in hun portfolio mogen zetten”. Dat probleem ben ik al meerdere keren zelf tegengekomen. Ik heb daar volgende ideeën over:
Bewijs je skills met vrij werk
Maak een privaat portfolio in PDF vorm of met een password-protected website als je zaken niet mag delen van ex-werkgevers.
Maar respecteer even goed de NDA’s. Vind de juiste balans tussen tonen en niet tonen. Als iets zonder logo’s overduidelijk van een bepaald bedrijf is, nog veel te recent, en het was een erg geheim project, hou het dan ook maar geheim.
Anonimiseer je mockups, haal de logo’s weg. Toon je interaction design skills zonder specifieke “content”.
Mail mensen met de vraag of je iets mag tonen. Wees expliciet over hoe je het zal tonen en in welke context. Je zal verbaasd zijn hoeveel keer het wél mag.
Om te eindigen…
De combinatie van een duidelijk CV, een goed geschreven motivatie en een portfolio openen de deur tot een gesprek.
Dat gesprek kan leiden tot meer: een tweede gesprek, een proef, een aanbod. Maar je initiële sollicitatiemail is de opener van dat alles. Zorg dus dat die in orde is.
I was typing up a comment to Bramus’s blog post, but it got a bit long, so posting it as a blog post here.
I saw the WWDC session on SF symbols – and it is great & interesting work. I am happy there is some standardization in iOS’s icons because things were going the wrong way before with sometimes weird choices (i.e. the person icon in the notes app being inconsistent with everything else, and there are more examples like this)
The fact that from a development perspective you can easily call up an icon from a base set using a simple API will surely help improve the baseline quality of apps.
However a tweet series from Marc Edwards did make me worry a bit about how the icons actually render. They don’t seem to be on the pixel grid. So I am wondering about the final quality of the rendering.
I also don’t really get why you would ever need the 100-200-300 weight and the 800-900 weights as well.
At this point we simply don’t design apps where heavy headlines have icons in them. I can imagine some app that wants to, for example, have a lighter/airy style to use hairline text and a matching icon to provide a base visual for a splash screen. But if it’s for art direction purposes, the chances that you will use it in the prescribed manner are slim.
I am curious what will happen when people get to work with this.
What is the point of the hairline and heavy weights for icons in actual user interface use? This reminds me of Google pointing out that you can customize Material with diamond shapes and then nobody doing it in practice. An idea born in a company that has near infinite resources, then executed in a good manner – but something that will eventually die when someone realizes it is not maintainable for the actual users of the system (i.e. native development teams).
The method outlined to create the icons is massively convoluted to me. It involves setting up an SVG file in a very specific way to then import it in Xcode. I wouldn’t specifically call this easy. For one icon it might be easy, but it doesn’t really scale.
So what do we have in the end from a design perspective if we have 20 icons? A folder with 20 templates that each contain a grid of icons where we only actually use one of the weights? So if we want to make a change and stay consistent with the rest of the icons – have to reference another icon – there is lots of effort involved.
Whereas for example for most of my icon work in practice I just have a single artboard in Figma where I can see all of my icons at a glance and I can work on improvements from there.
Why make things so complicated when there is no actual use case?
Why would one go through the effort of creating all the thin and black weights? Does Apple actually have an example of these things in use or is this purely a theoretical exercise? Did some poor soul (or I imagine a team of poor souls) create all of these weights for them to now never be used in practice?
TL;DR I admire the effort and parts of this are really great, but some parts of the system really have to be simplified in my opinion.
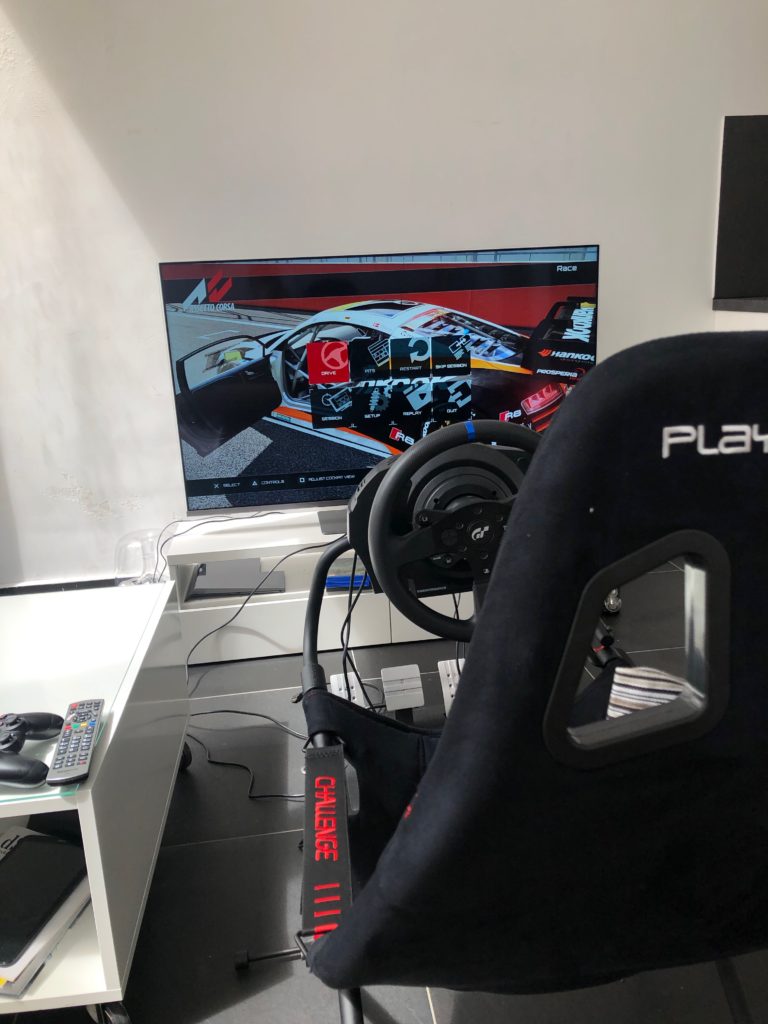
In de vorige post over sim racing twijfelde ik nog over hoe ik misschien een wieltje ging kopen, en een stoel. Na die week de echte sim racing ervaring te hebben gehad, kon ik me toch niet inhouden en ging ik ervoor. Ik kocht op Coolblue een T300RS – GT editie en een Playseat challenge.
De Coolblue “Vandaag nog” dienst deed zijn ding en om 23u30 op een vrijdagavond was mijn boeltje gemonteerd en begon ik aan mijn eerste race. 2 uur later was het toch tijd om eens te gaan slapen. Conclusie 1: racen met een wieltje is verslavend.
Die T300RS (met T3PA pedalen) wordt algemeen gezien als het beste stuur dat ook geen stukken van mensen kost. De force feedback is echt goed. De Playseat Challenge is een opvouwbare stoel. Handig, want dan kan je het uit de weg zetten. Conclusie 2: ik ben wel blij met mijn aankoop.
Nu, het racen zelf. Na een paar weken kan ik zeggen dat een stuur echt een nieuwe dimensie geeft aan racegames. Omdat je veel meer controle hebt over details in het sturen, en je ook de track “voelt”, wordt het racen veel leuker.
Je kan ook remmen in een percentage — if that makes any sense — door het rempedaal slechts gedeeltelijk in te drukken. Dat soort controle heb je met een controller niet; dan probeer je dat te compenseren door als een gek te tikken om “partial input” te simuleren maar dat geeft natuurlijk niet dezelfde stabiliteit qua input.
Vroem vroem
Qua games speel ik sinds vorige week vooral Assetto Corsa, dat een soort DLC-principe lijkt te hebben. Stond aan €9,99 als basisprijs en €2,99 voor bv. een pack met circuits en auto’s enzovoort. Dit spel voelt aan als een echte sim.
De algemene afwerking is wat slechter dan andere racegames (user interface van de menu’s enzo ;)) maar op de punten waar het er echt toe doet, de handling van de auto’s geeft het een zoveel beter gevoel dan pakweg een F1 2018 of een Gran Turismo.
Wat ook leuk is, is voor een officiële race het circuit eens checken in een game. Zo heb je een veel beter idee van waar de echte coureurs voor staan. Dat deed ik voor de GP van Monaco in F1 2018 (merci voor het idee, Peter).
Next up op de wishlist: Dirt Rally eens kunnen proberen in VR. Dirt Rally 2 aan een prijsje scoren. En Project Cars (2) eens proberen. Er is ook nog een opvolger voor Assetto Corsa. En eigenlijk ben je met 1 spel al wel genoeg, want je kan gewoon telkens beter leren racen. Maar toch. Nieuwe ervaringen!